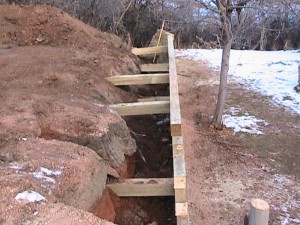
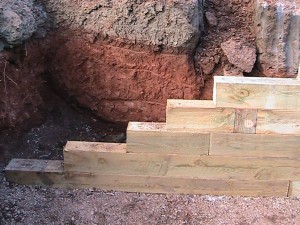
We built this wall in the fall of 2010. The existing wall that was there was leaning inward two feet because it was build with wire anchors (which had rusted through) and the joints were not over lapping. With this wall we used 5x6x12’ long timbers with 5×6 Dead Men, 1/2” – 5/8” Rebar and 12” Spikes to hold the timbers together.
TOOLS. The following tools will be needed.
- Speed Square and Rafter Square
- Pencil and 25’ Tape measure
- At least a 2lb hammer
- String Line and
 level,
 - 4’ level
- 1/2” drill (NOTE: if you use a cordless drill to drill through the timbers, it will burn up)
- 1/2” & 5/8” Rebar (NOTE: I use rebar because it’s less expensive than Spikes and also stronger; you will need a way to cut it.)
- Chainsaw
- Saws-all with a 12” wood blade
- Spud-bar, hand tamper (for compacting soil) and shovels.
- Wood auger drill bits (one size smaller than the spikes and rebar)
- Equipment (Depending on the size of the wall you may need a back hoe, Skidster, gas compactor, and a way to haul the excess soil away.)
Now you need to decide where you want the wall and mark it with marking paint or a string line. Call in locations, so that the utility companies can mark the gas, electric and phone lines, this is very important before any digging is done. To get the number, call one of your utility companies and they should be able to provide it for you. Get an idea of where you would like to have the base of the wall, and excavate to that depth and dig down an extra 4” to 6” deeper for your compacted base. I typically use a string line & level or a 4ft level to keep the base plumb. After this is done you will have your grade. Compact the soil at grade and apply your base course and compact it. Make sure the base is compacted well enough to provide the wall with a good strong base.
Start out with your first row of timbers making sure it is level by adding or removing some of the base course. Butt the timbers together, on turns notch the timbers so that they over lap by 6” to 8”. Drill holes through the base timber every 5’ ft and at every joint, then hammer 1/2” or larger rebar 18” in length through down into the ground. This will secure the base timber. After the first layer of timbers are laid it will need to be buried 6” with topsoil on the facing side of the wall. This helps with drainage and stability.
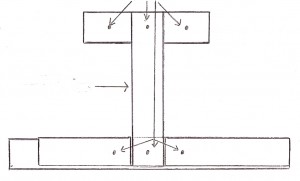
Now we stack the timbers on the timber base staggering the joints, drilling and nailing them together with rebar or spikes every 5ft, (Remember to nail each butt joint on each end). Every time I stack the timbers they get set back from the face of the wall a 1/2” in. So that when the wall is finished it leans away from the face of the wall, In other words the wall isn’t straight up and down. This gives the wall added strength. This wall will be 4ft tall and we placed the first dead-man at the third row, then staggered them at different heights anywhere from 6’ to 8’. On this wall there was a shallow gas line that I needed to go up and over with the timber base and I wasn’t able to place any dead-man in that area so I doubled up on dead-men in different areas. Everywhere there is a dead-man at the face of the wall I will nail it to the timber below and the one placed above it also nailing the two timbers ends that butt up to it. This makes the dead-man and the w all all connect together, so if the wall ever wants to move it has to take the dead-men with it. On this wall some of these dead-men are dug back 6’Ft and some due to there location are 3’ back. I always try to dig the dead-men back at least 3’Ft so that there will be more compacted soil around the dead-men. Notice in the picture that on the end of the dead-men I have placed a 3’Ft 5X6 under the timber that’s dug back, and tied it together with 1/2” rebar, driving it threw the timber and into the ground on the ends and in the middle. All of the dead-men will
 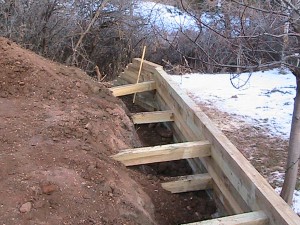 be done the same way.
Compact the soil in 6” lifts to assure these areas will be firmly compacted.
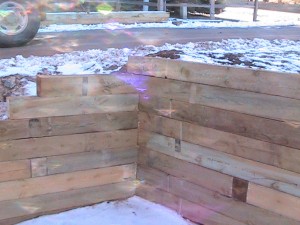
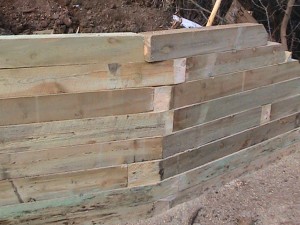 As you can see in this picture, I have alternating and over lapping joints. This will need to be done on outside and inside corners. I also placed a dead-man in the middle of the conner (very important for every outside corner). This is where I use the Sawsall with the 12” blade to trim the corner pieces flush with the wall. The top Timber hasn’t been trimmed yet.
With this picture, I cut the top end pieces at a angle to dress up the end of the wall.
Where the inside corner will go hasn’t been dug out yet, so we ended the wall this way until we could finish this inside corner.
This picture shows the inside corner finished. The timbers have alternating over lapping joints that are all nailed together. This is the same as a outside corner except, I didn’t need to place a dead-men on a inside corner.
This se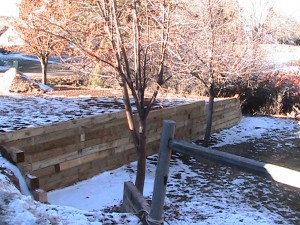 ction of the wall is finished and the rest will be done spring of 2011
When backfilling the wall I always use 1” or 3/4” clean rock at least one foot behind the wall, then soil. This rock is very important, it gives moister a way to escape and prevents the soil from pushing against the back side of the wall during the changing seasons. Behind the wall I have shaped the soil so that the rain water will drain fast in to a natural drainage ditch in the back yard and not set behind the wall. Sometimes we allow the rain water to drain over the wall fast, although in this case it would be best to drain it on the back side
How easy is it to install a sprinkler system?
Tired of paying outrageous sprinkler repair bills?

