Quantcast

Turning on your Lawn Sprinkler System-Spring Startup Video

In the Spring, I always get calls about  the various steps in the process of turning on a sprinkler system.

In most areas, sprinkler systems get winterized in the fall. This means the water will be off and drained from your sprinkler system.


To begin, find your backflow preventer.  This is usually found on the outside of the house. It will typically have two ball valves and some pepcock valves.
Using a screw driver, make sure the pepcock valves are closed. Close the ball valves, sometimes you will need channel lock pliers to do this.
Now you’re ready to turn on the water to […]

In the Spring, I always get calls about  the various steps in the process of turning on a sprinkler system. In most areas, sprinkler systems get winterized in the fall. This means the water will be off and drained from your sprinkler system.

Below the Video there are written instructions and pictures.


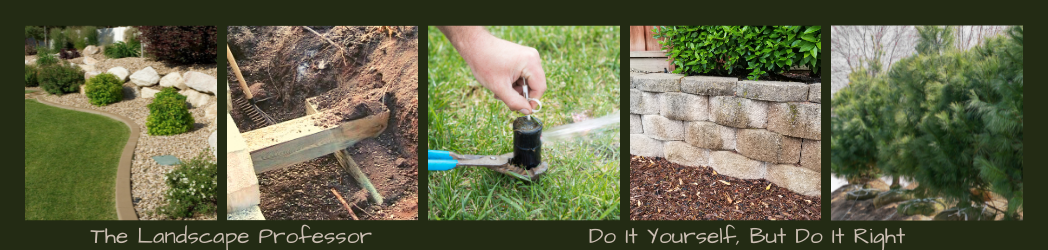
If this post has helped you, please help us spread the word by clicking on the social plugins, liking us on facebook or leaving a comment.  Thanks.Easy Sprinkler System Maintenance

 Adjust Rainbird 1804 Spray Heads Video

Adjust Rainbird 5004 Rotor Heads Video

Written Instructions Below

In most areas, sprinkler systems get winterized in the fall. This means the water will be off and drained from your sprinkler system.


  1. To begin, find your backflow preventer.  This is usually found on the outside of the house. It will typically have two ball valves and some pepcock valves.
  2. Using a screw driver, make sure the pepcock valves are closed. Close the ball valves, sometimes you will need channel lock pliers to do this.
  3. Now you’re ready to turn on the water to the sprinkler system. Always remember to fill your sprinkler lines slowly. The valve to turn on the water is usually near your water meter inside the house. Turn the valve handle slowly to fill the lines between there and the backflow preventer.
  4. Once the line is filled, go to the backflow preventer and open the lower ball valve. This is the one closest to the water source on the backflow preventer. This will close the check valve and supply water to the second ball valve on the backflow. Sometimes water will dump from the top or bottom of the backflow preventer. This is normal.
  5. Turn on the second ball valve 1/3 of a turn and fill your mainline. This is the line between your backflow and the irrigation valves. Remember to fill the line slowly to prevent a hammer on the mainline.
  6. One way to check and make sure your mainline is charged (full of water) is that you will no longer hear a hissing sound and the dial on the water meter will be still. (As long as no one in the house is using water.)

Programming your controller is next. All controllers have the same basic functions.

  • Time and Current Date (Remember to look at the am and pm)
  • Program Start Times (Most sprinkler systems run on one start time. If you have a drip zone this will need to run at different times than the turf zones)
  • Station Run Time
  • Advance Cycles (This is the days that it will run, Odd/Even, Custom or Cycle)


The most common mistakes made when programming the controller is having the current time off by twelve hours and having the program start times entered incorrectly. If your controller was plugged in all winter it may remember the settings, but it is best to check. If you have a battery installed, now would be a good time to replace it.


  1. Turn on each zone individually or in test mode and check your zones outside as they run. Always check for leaks.
  2. While each zone is running, check each sprinkler head, making sure it is operating and spraying correctly.
  3. Open all of the irrigation valve boxes and check for leaks while the irrigation system is running.
  4. I always tell my customers that rotor heads run for 20 to 30 Min, and spray heads run for 10 to 18 min. Also remember that the north side and shady parts of the yard may not need as much time to water and sunny areas may need more time. This will help your yard stay greener and save water.


Water shooting in the air, standing water, and bulges in the turf are all signs of a problem. If this happens, turn the water off to the system so that it doesn’t waste water until it is repaired. That should do it, I hope this helped and that you enjoy a long trouble-free season after turning on your sprinkler system.

Are you tired of paying for Sprinkler Maintenance & Repairs?

See Also:

Easy Sprinkler System Maintenance

 Adjust  Spray Heads Video

Adjust  Rotor Heads Video


This video loads slow for some people. It is the same as the one at the top.

Control Weeds with a Strong Weed Barrier (Landscape Fabric)

Control Weeds with a Strong Weed Barrier (Landscape Fabric)
Over the years I have seen several types of weed barrier (landscape fabric) fail and when they fail it’s quite a job to fix the problem.  First you begin to see a lot of weeds and grasses coming up all over your landscape area, then you realize that the weed barrier has failed.  All of the mulch needs to be removed and new weed barrier needs to be installed.  This is costly and labor intensive.
If your landscaping project is old or new, use good quality weed barrier and install it the right […]


Control Weeds with a Strong Weed Barrier (Landscape Fabric)

Over the years I have seen several types of weed barrier (landscape fabric) fail and when they fail it’s quite a job to fix the problem.  First you begin to see a lot of weeds and grasses coming up all over your landscape area, then you realize that the weed barrier has failed.  All of the mulch needs to be removed and new weed barrier needs to be installed.  This is costly and labor intensive.

If your landscaping project is old or new, use good quality weed barrier and install it the right way.  I use Typar weed barrier 3oz spun bound polypropylene or Dewitt 4.1 woven needle punch polypropylene fabric.  I never use any weed barrier lighter than 3oz even though these companies make lighter fabric.  Most of the time you will only find this weed barrier at your local nurseries or online.  Avoid buying weed barrier at your local stores unless they are good quality, most of the time they are not.

Your landscaping fabric should meet the following requirements.

  • The weight – 3.0 oz
  • Tensile Strength – 135 lbs
  • Elongation Strength (%) > 70
  • Puncture Strength (lbs) 35
  • Thickness 15.0 mils
  • Permitivity (Sec – 1) 1.2
  • Typically black or charcoal in color.
  • Check the name brand.


When you install the weed barrier overlap the seams by 4” to 6”, lap the fabric up against your edging or structure, and use 6” U Staples to hold it down.  When placing the fabric around your plant material, cover around the bottom of the plant but don’t make it tight around the trunk.  (NOTE:) Never use plastic, the plants can’t breathe or get water around the root ball.

Below is a example of landscaping fabric that has failed.  Look at how the weeds have grown through the fabric.

Top


Underside

How easy is it to install a sprinkler system?

I’m sick of paying outrageous sprinkler repair bills!

See Also:Landscape Edging How To

Wireless & Wired Rain Sensors For Sprinkler Systems

Did you know that most of the homes in America that have sprinkler systems, use 50% or more water per household to irrigate their yard? Thats a lot of water!  If we are able to save water with these sprinkler systems that amounts to millions of gallons saved every day.  I will touch on one way the homeowner can help save water and therefore money.
Over the years I have seen the Rainbird Sprinkler Co. go to great lengths to help our industry provide water saving tips and products for our customers.  I will touch on just one area and that […]

Did you know that most of the homes in America that have sprinkler systems, use 50% or more water per household to irrigate their yard? That’s a lot of water!  If we are able to save water with these sprinkler systems that amounts to millions of gallons saved every day.  I will touch on one way the homeowner can help save water and therefore money.

Over the years I have seen the Rainbird Sprinkler Co. go to great lengths to help our industry provide water saving tips and products for our customers.  I will touch on just one area and that is rain sensors. Rainbird makes three different rain sensor / rain shutoff accessories that disable our lawn sprinkler system from watering during or after a sufficient rainfall.   Listed below, I will discuss the differences, the ease of installation, and some difficulties that you may come across during installation.

The first is the RSD – BEx Rain Sensor (Rainbird).  TRainbird Rain Sensorhis sensor has moisture sensing disks that soak up the rainfall to determinewhen to disable your sprinkler system.  It has multiple rainfall settings from 1/8” – 3/4” that are easy to set.  It has an adjustable vent ring that helps control drying time.  This can be used with almost any controller on themarket old or new.  Hint: if you have a old controller that has no connections for the rain sensor, cut your common wire at the controller connect one wire from the rain sensor to it and connect the second wire to the other cut common wire.


  • Easy to install (hang it on the rain gutter or fence post)
  • Easy to use
  • Rugged, last for several years although the water-absorbing disks may rust and/or wear out.
  • Needs to be cleaned every year, especially if you have a lot of trees
  • The wire that comes with it can be hard to hide, not long enough at times, and needs to be hung on the side of the house most of the time.
  • Costs $20.00 to $45.00
  • Sometimes your soil (depending on your type) will dry before the absorbing disks dry.


Next is the Rain Check (Rainbird).  This automatic rain shutoff sensor catches rain water in a collector pan and the stainless steel sensing probes trigger the shutoff.  The stainless steel probes adjust down into the collector pan to measure rainfall and can shutoff the system with as little as 1/8” rain fall.  The water in the collector pan evaporates and the sprinkler system will run again.  Works with almost all controllers.

  • Easy to use
  • Easy to install (installs like the RSD – BEx)
  • Rugged-lasts a long time.
  • Has the same problems with wiring as the RSD – BEx.
  • Collection pan dries out fast after shutdown.
  • Needs to be cleaned more often especially if you have a lot of trees.
  • I have seen strong winds blow the water out of the collection pan so take note of where most of your strong winds blow from during the summer when installing.
  • Costs $60.00 to $75.00.


Last is the WR2 Wireless Rain/Freeze Sensor.   Wireless sensors have come along way over the years and there very reliable know.  This one will automatically sense rainfall and temperature events.  It has a rainfrall indicator with 6 rainfall set points from 1/8” to 1/2” and will illustrate approximate amount of rainfall relative to the rainfall set point.  Select from three set points for the freeze sensor.  You can also suspend irrigation.  You will need to read all of the instructions during installation.  I personally like this one the most.

  • Easy to install
  • Easy to program
  • Do not have to hide any wires.
  • Needs be cleaned once a year or more.
  • Need to change the battery every year.
  • Read all of the instructions.
  • It runs on 24 volts so it needs to be wired to the controller for power.
  • Do not place sensitive electronics in close proximity to the controller interface on sensor.  You may need to protect electronic devices.
  • Cost $65.00 to $95.00.


Are you tired of paying for Sprinkler Maintenance & Repairs?

Check out the link below

Easy Sprinkler System Maintenance


Tips for Laying Sod

Tips for Laying Sod
Laying sod is the fastest way to get a lush green lawn. It is more expensive than seeding, but unless you are paying for hydroseeding, sod will be a lot easier to take care of than seeding. When you seed yourself, weeds have a chance to grow too, and the grass can take a couple of seasons to fill in completely.
When laying sod, it’s very important to do it right. It’s certainly not fun or cheap to redo it.
Preparation-A Good Foundation For Sod

Loosen the soil 4” to 6” deep, this helps the plant grow. If the soil […]


Tips for Laying Sod

Laying sod is the fastest way to get a lush green lawn. It is more expensive than seeding, but unless you are paying for hydroseeding, sod will be a lot easier to take care of than seeding. When you seed yourself, weeds have a chance to grow too, and the grass can take a couple of seasons to fill in completely.

When laying sod, it’s very important to do it right. It’s certainly not fun or cheap to redo it.

Preparation-A Good Foundation For Sod

  • Loosen the soil 4” to 6” deep, this helps the plant grow. If the soil is hard and compact the turf area will always need more care and water.
  • Make sure that there is 4” to 6” of good top soil with organic material.
  • If you have poor soil add top soil to it or till in yard waste compost that’s well composted.
  • When in doubt take a soil sample and send it to a laboratory and see how much sand, silt and clay that you have.  Too much of one or the other will give you a idea of what will need to be added.
  • Hint – Top Soil isn’t always black or rock free.
  • Rake everything out sloping away from the house making sure that water will drain out and away fast.

Mistakes to Avoid When Laying Sod

  • Not having the top soil prepared or having enough of it is one of the biggest mistakes people make.
  • Another mistake that’s made is not making sure that there is proper drainage away from the house and through the yard.

Laying the Sod

  • Stagger your seams, keeping the seems tight and lay your sod horizontal to your slope. This will prevent the water from following the seams down hill and not staying on the sod.
  • If your yard has a steep slope always start laying the sod at the bottom of the slope.  If you start at the top the sod will want to slide down as you lay it and this makes for a sodding disaster.

Watering Your Sod

  • Now that the sod is laid spread a good starter fertilizer and water immediately.  Depending on the time of year, water two to three times a day for a week, more if needed.
  • Back off watering the second and third week.
  • Check to see if the sod is rooting down by pulling up on a corner of the sod and look for white roots.  Most of the time it takes 4 to 6 days for this to cure.
  • If there is ever standing water or a lot of water is running  off the sod, back off the watering.
  • The third and fourth week you could water every other day.


The best time for sprinkler system installation is before you lay sod.

Check this link out

How easy is it to install a sprinkler system?